i want to
SHOP
by
  • DESIGNER ASSIST
  • ADVANCED SEARCH CURATOR

LOG IN

Tag Archives: how-to

  • How-To: Custom Request Art Work


    Here at Map Acte 3 we understand that, in interior design, one size does not always fit all. Therefore, we have made it a point to match the versatility of our line with the versatility of our publishing options. As a result, the size, substrate, and finish of most art works can be customized to meet your design needs. As long as the "Customize" button appears on the product item page, you can custom design the art work for your design space.

    Oversized art work can be custom printed, in sizes up to 48 x 96" on Plexiglas, to fill a larger wall space. Art work can also be customized to fit any wall space, as the composition of an art work can be altered from landscape to square to portrait.

    To add interest to an art work, it can be broken up into multiple segments to be hung together.

    5b1979510abd35701ce2b2a4b1b39ce3

    If you find an art work you love, but need the colors to match those chosen for accents in the room, we can match the color in the art work to any Pantone color.

    Watch this video to see how you can custom design your artwork!


  • How-To: Create a Project PDF on our Website


    Our new website, www.mapacte3.com was created with our customers in mind. With a clientele composed of interior designers, art consultants, and art enthusiasts, we aim to facilitate the design process for each customer, no matter what their design needs. For this reason, one of the great new tools on the website is a Project PDF creator. This quick and easy-to-use feature is helpful for presentations, as it includes all of the information about each artwork you intend to use for a particular project in a single document.

    Whether you're tech-savvy, or still getting used to navigating the web, this video will be a great assistant, teaching you how to use this Project PDF tool to facilitate the design process. In 3 minutes, you will learn how to create a Project PDF, ready for sharing with your clients, or design consultants.

    If, however, you wish to save images of the art work from our website onto your computer for a project, that is still an easy process as well. To do so, follow these 3 steps:

    1. Click on the image you wish to save.
    2. Once on the product page, you will find two images of the product.
    3. To save an image of the product, either right click on the smaller image positioned under the large product image, and save the image, or click and drag that image onto your Desktop.

    We expect that the use of these features will result in quicker and easier project creations and presentations.

    Happy designing!


  • How-To: Unwrap a Fresh Look With Plexiglas

    nicolas le beuan benic P1020231

    You ordered your customized plexiglas piece. You eagerly awaited it’s arrival. Finally, you open the door to a big cardboard box. What now? 

    You may be excited to have received your unique Plexiglas print, but you may also be experiencing difficulty moving your Plexiglas piece from a box on your doorstep to an artwork on your wall.

    I’d like to help facilitate this process. Follow these 10, easy steps to unwrap a fresh, new look for any space.

    Before you begin, it may be helpful to note that you will need scissors, an open space, and possibly another person to help you.

    1. Clear a space. This box in which you will receive your Plexiglas piece is big, and the artwork itself is even bigger. Give yourself room to unwrap the piece.

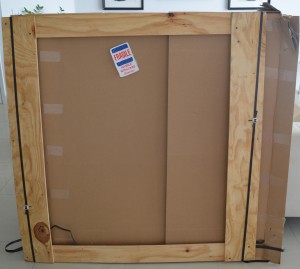
    When you receive your box, it will look something like this.

    DSC_0236

    2. Cut through the tape that holds one side of the box together.

    3. Open the flaps that conceal the work within the box. Inside, you will find a smaller box of cardboard, which is wrapped around the artwork itself.

    4. Hold the wings of the unwrapped side of the box open, and pull the smaller cardboard box out of the larger cardboard box in which it is wrapped. This may be a two-person job. To make this easier, have one person pull the smaller, inner cardboard box, while the other pulls the larger, outer one.

    5. Lay the smaller cardboard box on the floor, in your open space, making sure to keep the side completely covered by cardboard facedown.

    DSC_0230

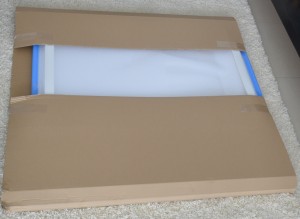
    6. Open the flaps of the cardboard that are holding the artwork, to expose all of the bubble wrap. Once you complete this, you will find the artwork to be wrapped in bubble wrap with foam securing the edges.

    DSC_0233

    7. Take off the tape that seals the bubble wrap around the Plexiglas piece. You will find this around the edges of the painting, just before the foam on the edges.

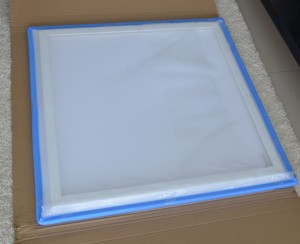
    8. Remove the bubble wrap from the Plexiglas piece. At this point, it may help to carefully bring the painting upright, so that the bubble wrap can be removed from the entire work.

    DSC_0242

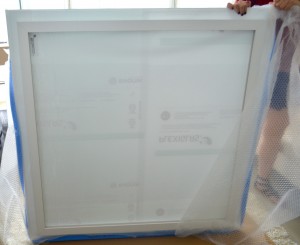
    9. Remove the sheet of paper that covers the front of the artwork. This will expose the plastic layer that protects the Plexiglas from scratches.

    DSC_0251

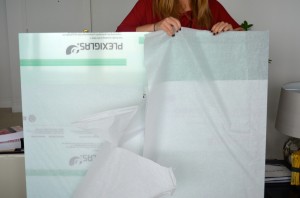
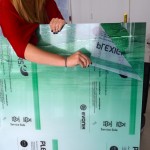
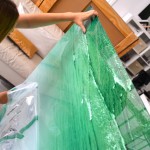
    10. Carefully peel this protective layer from the surface of the artwork. It helps to begin at one corner, and then to work your way down and across the work. Be careful not to scratch the work during or after this process.

    DSC_0259DSC_0261DSC_0263DSC_0266

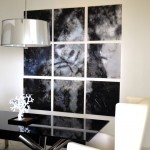
    Once these steps have been completed, your Plexiglas piece will be ready to hang! Attached to the back of the piece of Plexiglas, you will find a wooden frame that should be used in order to hang your work of art.

    Unwrap the crisp clarity offered by any Plexiglas artwork to brighten up your space.


3 Item(s)

per page
(3 Items)